Showing posts with label art class. Show all posts

Saturday, July 25, 2020

The Secret of Good Artwork

Let’s take a moment to talk about what it takes to produce good art. Many of you began studying art at an early age, maybe you took a class in high school or college, but later quit to get a job that pays well for as we all know, it’s tough to make a living as an artist. Or, perhaps you were busy raising a family and didn’t have time to pursue it.

Like a lot of people, I waited a few years, but I always knew I’d return to painting someday. Twenty-odd years ago, I began taking courses and began to draw and paint a lot. Over the last few years, I’ve had people ask me, “How long did it take you to paint that?” And I would tell them, “About twenty years.” Of course, they would frown and say, “Okay, but right now, how long did it take?” The thing is, there’s no way to convince someone who doesn’t understand that creating a pleasing piece of artwork didn’t just happen when I first picked up a brush. I have a lot of paintings that never saw the inside of a frame, and some that shouldn’t have. It took me more than twenty years and more than three hundred paintings to learn how to paint the way that I do. And I’ll never stop learning. In another five or ten years, my style will probably change and the same picture would look completely different.

Slash by Marc R. Hanson.
During those twenty years, I studied with some of the best painters in the East, including Don Demers, Stapleton Kearns, Mark R. Hanson, Richard Schmid and Albert Handel. The reason that I chose these artists is that I admired their style of painting and I wanted to learn how they accomplished their work by watching and listening.
20010637_Big by Stapleton Kearns.

After a few workshops, I noticed that there was a pattern to their information, even though they each had their own individual style. Just about all of them said that, with some knowledge, you will mostly learn by producing a lot of work. The more you do, the better your art will be.

I may have discarded some of this class information, or replaced it with something else, but a great deal of it has stayed with me over the years, and I find myself repeating their instructions to myself as I go about creating art. I highly recommend taking workshops or classes with those artists that you admire, pay close attention to what they say, read and reread their books, and buy their videos. Watching demonstrations is a great way to understand their process, and if you can do it in person, that’s even better. It is much harder to learn on your own. And don’t expect to remember everything in the beginning. There’s a lot to think about.

The Wisdom of Ira Glass

Ira Glass is the host and executive producer of the popular National Public Radio show, This American Life. Each week, This American Life is broadcast to more than 1.7 million listeners across 500 different radio stations. But it wasn’t always this way.

Glass talks about the process of learning creative work very eloquently:

“Nobody tells this to people who are beginners. I wish someone had told me. All of us who do creative work, we get into it because we have good taste. But there is this gap. For the first couple years, you make stuff, it’s just not that good. It’s trying to be good, it has potential, but it’s not. But your taste, the thing that got you into the game, is still killer. And your taste is good enough that you can tell that what you're making is kind of a disappointment to you. A lot of people never get past this phase; they quit. Everybody I know who does interesting, creative work, they went through years where they had really good taste and they could tell that what they were making wasn't as good as they wanted it to be. They knew it fell short. Everybody goes through that. And if you are just starting out or you are still in this phase, you gotta know that it’s normal and the most important thing you can do is DO A LOT OF WORK. Do a huge volume of work. Put yourself on a deadline so that every week or month, you are going to finish one [story]. It’s only by going through a volume of work that you will close that gap, and your work will be as good as your ambitions. And I took longer to figure out how to do this than anyone I’ve ever met. It’s gonna take a while. It’s normal to take a while. You just got to fight your way through that.”

Read more about Ira Glass...

Consider Yourself Challenged!

Okay, I've heard from a few of you, but I'd like to hear from those who have kept silent while enjoying my emails. So, what are you waiting for? If you've been drawing, painting, doodling, etching, coloring with crayons, sewing, knitting, embroidering, sculpting, making origami or any other type of creative art, send me a photo. Send your photos to pmeglio99@gmail.com and I will post them in my next challenge email.

Tuesday, July 14, 2020

Blind Contour Drawing

Contour drawing was first taught at the Art Student’s League in New York by Kimon Nicolaïdes in the 1920s and 30s. He used it and other exercises as a way to train his students to observe their subjects more closely. His methods are still being taught in art schools today. 

Blind contour drawing involves carefully observing the outline and shapes of a subject while slowly drawing its contours in a continuous line without looking at the paper. By doing so, you are forced to draw what you actually see instead of what you think you see.
Blind Contour Drawing Exercise

You should definitely try this! If you do, please send me a photo of your results, including a photo of your subject. Let me know what thoughts are running through your mind and your observations as you move your pen/pencil around the page.

For this exercise, you will need the following:
  • A pen or drawing pencil
  • A drawing pad
  • A timer
  • A simple subject. I suggest your hand, a shoe, or a grouping of fruit. Anything fairly simple will do.
  1. Place your subject at a 90 - 180-degree angle away from your forward drawing position, to the left if you are right-handed, or the right if you are left-handed. You need to be looking away from your paper.
  2. Set your timer for ten minutes.
  3. Set your pen/pencil on a point on the pad and look at one area in your subject.
  4. Begin drawing, don’t look at your drawing pad and don’t lift the pen/pencil from the pad.
  5. Go slowly. As your eyes follow the line of your subject one millimeter at a time, your pen/pencil will move at the same slow speed.
  6. Follow the outline and inner lines of your subject, including the details within the subject, changing direction, without lifting your pen/pencil. Try to follow the lines as if you were actually touching the object with your finger. Feel the item as it curves here, depresses there, and as it twists and turns.
  7. Do this without stopping until the timer goes off.
When you look at your picture, it will look like a crazy jumble of lines, but if you look closely, you will see an interesting pattern, one that includes a lot of details that you may not have realized if you had not learned to see it.


Instead of provoking anxiety, blind contour drawing is meant to help you practice your observation skills. If you approach the technique with patience, it can even be a calming exercise. Look at it as a sort of exercise in meditation. The pen goes down on the page and your eye goes to a specific point in your subject and your eye and the pen move in sync.

There’s just something about moving that slowly and that focused that makes you empty your brain of everything else. You will begin to see things differently and your skills in seeing and drawing will improve.

My effort here to do a blind contour drawing. I admit I had trouble doing this very slow and ended up redrawing the images of the carrots, so there are two sets here. I used a Pentel pen, Doing this is a great way to slow down your eyes and check shapes and relationships.

According to Nicolaïdes, “Because pictures are meant to be seen, too much emphasis (and too much dependence) is apt to be placed upon seeing. Actually, we see through the eyes, rather than with them. It is necessary to test everything you see with what you discover through the other senses – hearing, taste, smell, and touch – and their accumulated experience. If you attempt to rely on eyes alone, they can sometimes actually mislead you.”

You can read about this and a series of other drawing exercises created by Kimon Nicolaïdes in his 1941 book The Natural Way to Draw: A Working plan for Art Study.

Tuesday, June 16, 2020

Drawing Simplified, Part II: Shadows and Form

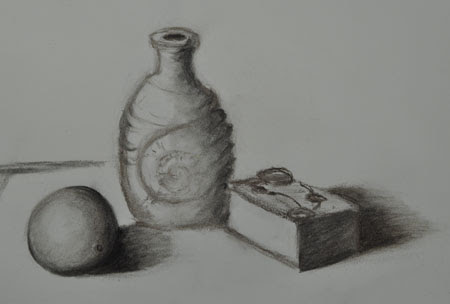
One of the basic foundations of a good drawing or painting, besides rendering the proper shape, is good form. Form turns a two-dimensional object into a three-dimensional object, and gives interest to a picture. All objects have form, some more subtle than others, depending on the light source. Shadows provide form to objects and are denoted in values. The number of values (the dark and lightness) to a form depends on the light source, how close it is and how strong it is.

Shadows

Shadows provide dimension to an object. The shadow shape is the most discernable shape of value of an object. It is opposite the light source and reveals both the form (a solid shape with volume) and plane (a flattened area of a form) of an object. 

Shadow Edges

Depending on the object, the edges of a shadow can be either sharp or soft. Observing an angular or planed object, as one plane meets another and turns away from the light, the shadow edges are sharp. For a curved object, the shadow edge is soft with a gradual shift in tone. Distance also plays a part in the edges of a shadow. If the light source is close to the object, the cast shadow is softer on the edges. As you pull the light away from an object, the cast shadow is longer and has sharper edges.

Dimension

The angle of light will affect the solidity or volume of an object. If the light is directly in front of or behind an object, the shadows on the object are not as distinct and the shape flattens. Turn the light so that it comes from the upper left or right, however, and you will see a three-dimensional view of the object, with a wider range of values. 

Cast Shadows

A cast shadow occurs when an object blocks the light and casts a shadow on a surface. It is usually a darker shadow than the shadows on the object. Changing the level of light will change the length of the cast shadows. The lower the light on the object, the longer the cast shadow. In this case, care should be taken that the shadow doesn’t become the focus of the picture, rather than the object itself. 


chiaroscuro

A term used to describe the use of light and shade in a painting or drawing, particularly when strong contrast is employed.
From the Italian for light (chiaro) and shade (oscuro).

Next

Reflections and its effect on an object’s color and light.

Friday, June 5, 2020

Drawing Simplified - Part I

I've heard time and time again, "I can't draw." or, " I can barely draw a stick figure," or, "I'm not talented enough to be able to draw." I emphatically disagree. It's not a matter of talent. Drawing, like everything else, must be learned. The thing is, more often than not, we've never been trained to draw. Think about it, in school, we were taught our alphabet, arithmetic, and grammar. We've never been taught how to draw, maybe because it was considered frivolous to know how to draw, or perhaps being creative is not considered useful.

These days, with so much going on in our lives and especially with the fear of the pandemic all around us, it's more than ever important to have a creative outlet to turn to. Art can bestow a calming feeling, and help us to cope with life's struggles. Studies have shown that creating art decreases negative emotions, reduces stress and anxiety, and can help you live longer. Creativity helps you see things differently and better deal with uncertainty. Studies show that creative people are better able to live with uncertainty because they can adapt their thinking to allow for the flow of the unknown.

So, where's the best place to start? Some people jump right into a fun medium like painting or pastels, or print making, whether from life or from a photo. However, if you don't have at least basic drawing skills and create a line and value drawing of your subject before you turn to your favorite medium, there's a good chance that you will struggle with the design and structure of your subject.

Like learning your A,B,Cs, or simple math, you need to start with the underlying structure. In most cases, it's worked out in a drawing. The best place to start with drawing is with simple shapes.

What are Simple Shapes?

Everything we see, whether from nature or man-made, can be broken down into simple shapes. These shapes include the square or cube, sphere or circle, and triangle or cone.

Before you protest that you can't draw a straight line, there are tools for that. If you can draw a straight line with a ruler, you can make a square. If you can use a compass, you can make a circle. From a square, you can make a rectangle, and, if you can draw a triangle, you can make a cone shape.
The Square A container like this tea tin, when viewed straight on, is a square.
Extending the lines of your square upward will help you to draw this canister.
           

The Circle

If you have a compass, you can make a circle. When drawing an apple, start with a circle and add the necessary curves and indents that will make up the bottom and the area of the stem.
Add the lip and handle to make this pitcher. While drawing, think about the placement and size of the negative shapes, the areas around the subject.


Use a Guide Line

Draw a straight line up the center of your shape and use it to help guide you as you draw your subject. You can measure from the line to both sides of the circle, square, or triangle to check your shape. This is especially helpful with symmetrical shapes.
The Triangle

Start with a guide line in the center of this conch shell and bottle, then draw your triangle. Curve the short side of the triangle, and you have a cone shape. Do a line drawing, then add shading.
       

Measuring

Whether working from life or from a photo, it's important to check your measurements as you draw. Use your pencil or some kind of measuring device to check both length and width. Check the proportions carefully as you go. When you start with a drawing, it's a lot easier to make adjustments to both the measurements and the composition than it is to make changes in your medium.


One must always draw, draw with the eyes, when one cannot draw with a pencil 
-Balthus

Next

I'll continue with some basic drawing techniques in Part II.

Class Schedules

I'm dying to get back to teaching my classes and I know some of you can't wait to sign up.
I've updated my class schedule for the fall. It's obviously going to depend on whether and when the high schools decide to be open for Adult Ed. classes.
If Artsplace is open, I hope to schedule a class there.
For seniors, it's whether the Town of North Haven deems it safe to reopen the senior center.
For now, you can view my scheduled classes on my website.

While you're there, check out my newest additions to my artwork.

Stay safe and be well.

Tell Me What You're Doing That's Creative

I hope you enjoyed this first session of Drawing Simplified. Feel free to share with others. Please continue to send me photos of your work. I'll do another Creative Challenge in a few weeks.

I'd love to hear from you. Are you feeling inspired? What are you doing to stimulate your creative side?

Friday, May 29, 2020

Painting the Farm River - Part III

Welcome back to Painting on the Farm River. This is the final installment of this series. I hope I have inspired you to go out and paint from life nature in its beauty among the birds, butterflies, and nefarious bugs. If you've never tried it, it seems daunting, but be brave! You will learn so much by working from life, I promise.
Last week, I threw the gauntlet down, and challenged you. The response has been lukewarm and my armor is getting heavy. It would be fun for everyone to see your artistic inspirations, so you have one more week to share.

Aerial Perspective

The view from where I stood included a tree line at the farthest point of the river that stretched two to three miles. To understand how to paint objects in the distance, it is important to understand how Aerial Perspective works. Aerial Perspective is the atmospheric distance between objects in a painting. The presence in the atmosphere of moisture and tiny particles of dust and similar material causes a scattering of light as it passes through them, the degree of scattering being dependent on the wave length which corresponds to the color of the light.

Because light of short wavelength (blue light) is scattered the most, the colors of all distant dark objects tend toward blue. For example, distant mountains have a bluish cast, and yellow disappears as it recedes, followed by red.

The heavier the atmosphere, the more pronounced the effect. It is most apparent in lower elevations that commonly have higher amounts of moisture in the air. There are value changes as well. All things become cooler in color (except white) and lighter as they recede into the distance, and their edges soften. White takes on a warmer and darker shade.


"It would be impossible for me to paint slowly out of doors, even if I wanted to... There is nothing immobile in our surroundings. Water curls up all the time, clouds change shape as they change places; the rope that hangs from that boat over there swings slowly back and forth; the boy jumps; those trees bend their branches and raise them up again...But even if everything were petrified and fixed, it would be enough just for the sun to move, as it does continuously, in order to give a different appearance to things... One must paint quickly, because so much is lost, in an instant, and you never find it again!"

–Joaquin Sorolla, speaking of his time spent painting in Javea

From My View


Three hours had passed by since I began painting en plein air and the painting was starting to take shape. I’m more than ever aware of values and edges as I mixed and applied my paint.
The bushes and trees in the distance were lighter in color, and value, so I lightened them with white (a cool color) and used less yellow in the mix. The vines and trunks became a lighter red/purple. I also softened the edges quite a bit to push them into the distance.
The sky was a nice light blue, with no clouds. The sun was in front of me, overhead but not within sight. It provided some beautiful reflections on the water.
Since I began, the sun had moved and the light was beginning to change, so I stopped. When painting outdoors on a sunny day, you only have between two and three hours before the light changes, affecting the values of the subject and the length and direction of the shadows. Cloudy days are more forgiving.

I finished the painting in my studio, with the memory of the river still fresh. The blue in the water needed more emphasis, as did the moss greens, the rocks, and the lightest highlights on the water, rocks and the hemlock tree. I also darkened my shadows under the fallen trees and near the rocks. I had a photo, but only referred to it for detail information.

Next

Some photos of your artistic endeavors.

"Painting, when you feel it, is the greatest thing in the world. No, I've said it wrong, it's Nature that is beautiful."
-Joaquin Sorolla

Consider Yourself Challenged!

I can’t believe that only two of you have been working on art since the advent of this pandemic. At least, I’ve only heard from two since I’ve started this email lesson. I know there are more of you being creative during this time of seclusion, so step up to the challenge!

Hey, this armor is getting pretty uncomfortable so give me a break. If you've been drawing, painting, doodling, etching, coloring with crayons, sewing, knitting, embroidering, sculpting, making origami or any other type of creative art, send me a photo. 

Wednesday, January 30, 2019

Workshop Everything but White Snow

I ran a workshop for seven students at Artsplace in Cheshire last Saturday. The name of the workshop was Everything But White Snow. I had students of all ages and all levels attending. Some of them had never painted with oils. We copied one of my paintings, Snow Blanketed Field.

The  painting was of a farm field that I painted from my living room window one winter. It was early morning so the shadows were long and very distinctive. The colors in the snow were several shades of blue, pink, yellow, orange, and purple. 

Normally, I coat the canvas with a wash of color, in this case a yellow or orangey yellow. I found that the Turpenoid did not dry as quickly as mineral spirits. This caused the paint to bleed into the top paint and produce a greenish tint. I didn't realize this at first and it was too late to do anything about it. Mineral spirits do not do this. 

Just the same, the paintings turned out great. First, I had the class do a pencil drawing to show where the darks and lights are, and to get them used to drawing the shapes. Then, I walked the class through a dark to light process. I find when I teach that students do not want to do a drawing at all. Many have a hard time getting the drawing correct. Usually, this means that the painting result is disappointing. I try to emphasize that the drawing is the most important part of the process. Understanding how the eye flows through a picture, deciding and positioning the focal point, and figuring out the values is so important. Drawing it all out helps to get the vision in your head before you pick up the brush.

I love to watch as the students move from one area to another in the process. It's easy to tell those who are used to mixing colors. Gaining knowledge of color mixing takes time and a lot of practice. Studying the color wheel and doing color charts helps, though it's not as exciting as diving into the paint and attempting to match colors on the canvas. I have done the whole gamut of mixing colors for color charts using Richard Schmid's techniques described in his first Alla Prima book.  I confess that I don't pull out the charts as often as I should, but every now and then I do look at them. I highly recommend doing the color charts.


The students nearly finished their paintings, and seemed rather pleased with the results. I think some of them will continue to work with oil paint. I had fun teaching the class. They were all very excited to see what they could do. I was pleased to see how well they did.